TECHNICAL GUIDE
When a printer gear assembly station runs short of parts, increasing feeder output is an understandable reaction. It is not always the right one. The interruption may start with overlapping gears in the bowl, a changed component lot, a blocked discharge sensor or a receiving nest that has not released the previous part. Each cause needs a different response.
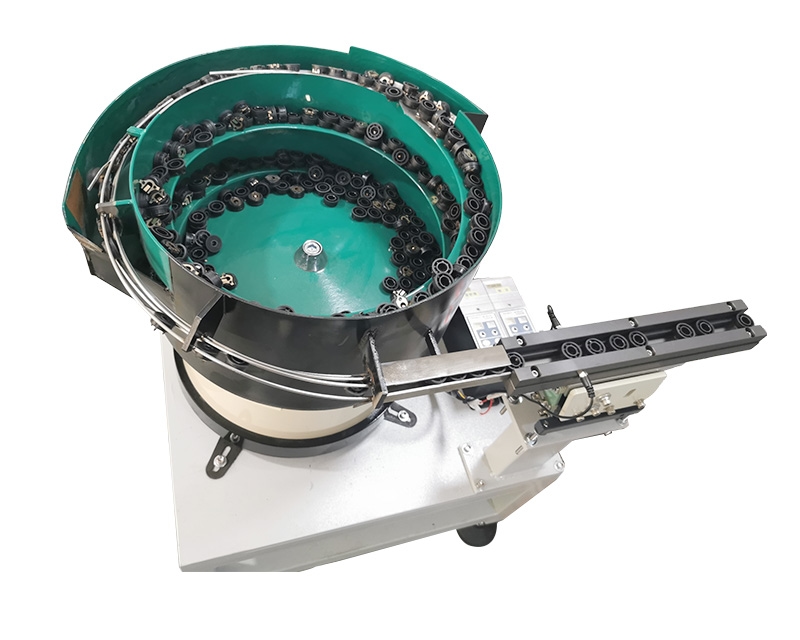
This diagnostic guide applies to planning and reviewing a YH-748 printer roller gear feeding application. Use the delivered machine instructions and site procedures for actual adjustments. Stop and isolate equipment before clearing jams or entering guarded areas. Never reach into a moving feeder or bypass an interlock to keep a test running.
View the application workflow diagram (conceptual illustration)
Describe the failure before changing anything
Replace “the feeder is unreliable” with an observable condition. Does the bowl stop moving? Do gears reach the outlet but fail to cross the transfer? Does the pickup nest remain empty despite a queue upstream? Is the part present but facing incorrectly? A short description of the first visible failure is more useful than a general complaint about speed.
Record the production lot, part revision, machine state and whether the problem followed replenishment or changeover. Observe from outside the guarding. If permitted, capture a short video showing both the outlet and the receiving station. Avoid recording only the bowl center, where the downstream cause may not be visible.
Check whether the incoming gear changed
Compare current parts with the approved sample or retained reference lot. Look for visible flash, contamination, a changed hub edge, distorted pieces or a different surface finish. Confirm the drawing revision and supplier information rather than relying on color. Two gears can look similar while behaving differently at a narrow guide or supporting rail.
Keep suspect parts labeled and separate. Do not sand, lubricate or otherwise modify them to make them feed unless the product and process owners approve a documented trial. Such changes can hide the real cause and create a material condition that will not exist during normal production.
Distinguish overlapping from incorrect orientation
Two gears arriving together are a separation problem. A single gear arriving on the wrong face is an orientation problem. The symptoms may appear at the same outlet, but they should not be treated as interchangeable. Note whether the unwanted condition already exists before the final guide.
For overlaps, investigate where a second gear first rides onto another or bridges across a gap. For face reversal, trace where the accepted face is first lost. Preserve the evidence: a displaced part at the pickup nest may show the end of the fault rather than its origin. Only trained personnel should inspect or adjust tooling after safe isolation.
Look for a transfer problem
A bowl can perform consistently while the transition to the linear track causes interruptions. Review the approved relationship between the two sections, including their alignment and supporting arrangements. Look for evidence of unintended contact, movement or wear. Do not alter clearances by eye; compare them with the delivered setup information.
The gear's bore and hub can make a small transition more significant than it appears. A part that is stable on a wide surface may tilt when support narrows. If the stoppage always occurs at one boundary, document that location and the gear attitude there before changing any controller setting.
Review the queue at the receiving station
Check the machine sequence with the controls or integration team. Is the station requesting another gear? Has the previous pickup been confirmed? Is a full-track condition correctly stopping replenishment? A feeder that pauses because the downstream queue is full may be behaving exactly as intended.
Distinguish a missing part from a missed detection. Verify sensor condition and alignment using the approved service procedure. Never change a sensor's mounting or sensitivity merely to suppress an alarm. The validation must include a genuinely absent gear as well as a correctly presented one, under controlled and safe test conditions.
Treat damage as a separate investigation
A marked tooth or damaged bore can originate before the part reaches the feeder. Compare incoming samples with pieces collected at successive permitted inspection points. Identify the earliest location where the defect becomes visible. Use the same inspection criteria at each point so that the comparison is meaningful.
If damage appears after repeated circulation, record the operating condition associated with that circulation. If it appears only after the final release, review the receiving nest and release sequence. Avoid concluding that all marks are harmless because the gear still assembles; acceptance belongs to the component drawing and product quality process.
Change one approved variable at a time
Once the fault is located, return to the accepted setup record. A series of unrecorded changes to vibration, loading, guides and sensors makes it difficult to learn which action helped. Log the original condition, the authorized change and the result, then compare against the same test sequence.
Controller settings are not interchangeable between equipment configurations. Do not copy values from another feeder or an online example. Ask the responsible engineer which operating range is approved for the delivered drive, bowl and load. Adjustment should preserve component condition, not merely increase visible movement.
Use a short restart verification
After an authorized correction, verify more than a few successful parts. Include the operating conditions that previously exposed the issue: normal refill, a downstream pause, restart and the relevant production lot. The duration and acceptance criteria should come from the application's validation plan rather than an arbitrary universal rule.
A practical record can include:
- The symptom and the first location where it appeared.
- Incoming component revision and lot identification.
- The approved adjustment or replacement performed.
- The receiving-station condition during the test.
- Surface and orientation inspection results.
- Remaining concerns requiring engineering review.
Build prevention into daily observation
Routine observation should make developing problems visible. Operators can check that the correct part is loaded, guards are in place, the expected recipe is selected and no unusual accumulation is visible. Cleaning and inspection tasks must follow the delivered instructions, including approved materials and isolation requirements.
Keep an example of each recurring fault in the maintenance record where practical. A photograph of an overlapping gear pair or an incorrect hub orientation can make a handover between shifts much clearer. Use the record to identify recurring component or transfer issues rather than repeatedly retuning the same equipment.
Common questions
Should I increase vibration whenever output falls?
Not without identifying the cause. A downstream block, overlapping pair or incorrect component lot may not be corrected by higher vibration and could become harder to diagnose.
Is every stopped gear a feeder defect?
No. The receiving fixture, control sequence and incoming component condition are part of the investigation. Trace the first point of instability before assigning the cause.
When should I contact engineering?
Escalate repeated surface damage, unexplained orientation failures, changes to the component drawing or problems requiring tooling modification. Send the symptom record and sample details with reference YH-748 so the review addresses the actual operating condition.