GUÍA TÉCNICA
A connector feeder that worked yesterday may behave differently after a new container is loaded. That timing is useful evidence, but it is not a diagnosis. The new lot could differ within normal production variation, the machine setup may have changed, or a downstream condition may have become visible at the same time. A disciplined comparison helps separate these possibilities.
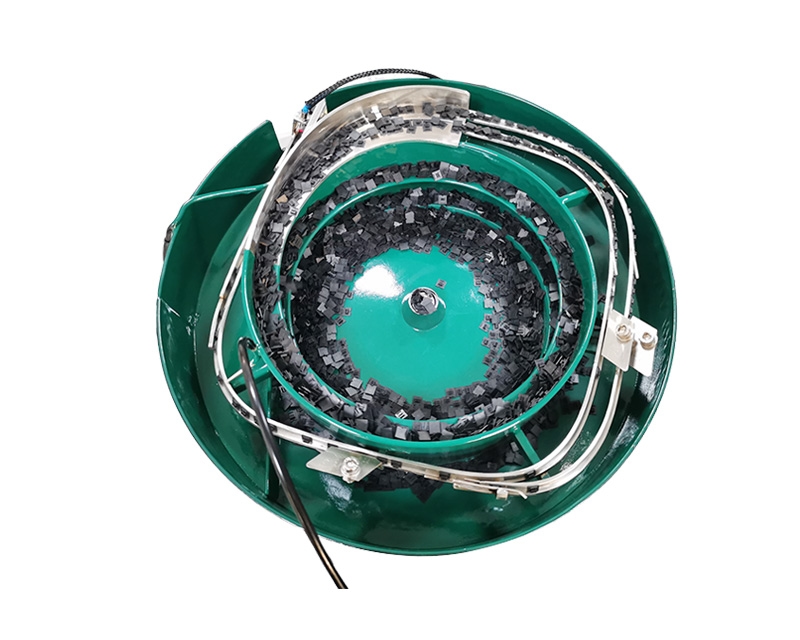
This guide concerns troubleshooting a YH-750 electronic connector feeding application. Follow the delivered operating instructions and local safety procedures. Observe from outside guarding, and use authorized isolation before inspection or intervention. Do not bypass sensors or interlocks to reproduce a fault.
View the application workflow diagram (conceptual illustration)
Preserve the evidence before adjusting
Retain identified samples from the previous accepted lot and the current lot where available. Record supplier, part number, drawing revision and incoming assembly state. Keep the samples separate; mixing them removes the comparison that can make the investigation useful.
Record the machine setup at the time the change was noticed. Include tooling and recipe identification, the receiving fixture and any authorized adjustment made since the last accepted run. A component comparison is incomplete if the machine condition is unknown or has already been changed repeatedly.
Describe exactly what changed
Identify whether the problem is separation, orientation, transfer or pickup. Examples include two housings arriving together, a latch-facing direction changing at a guide, or a correctly presented component remaining in the receiving nest. Each observation points toward a different question.
Avoid describing every interruption as a jam. A full-track pause may be a normal control response, while an absent confirmation may relate to detection rather than physical blockage. Use the agreed machine-state terminology so maintenance, quality and production discuss the same event.
Find the first point of divergence
Trace the part path from incoming supply toward the receiving station. Determine where current-lot behavior first differs from the accepted condition. If both lots travel similarly until the final release, focus the review there rather than changing the entire bowl setup.
Observe only through permitted access and inspection points. A short video taken safely from outside the guard can help identify a sequence that is difficult to describe. Include the relevant transfer or receiving location, not just general movement in the bowl.
Compare the features used by the tooling
Use the component drawing and tooling documentation to identify relevant support and orientation features. Compare those regions on the retained samples. Visible differences in a shoulder, latch, molding edge or surface condition may be more relevant than a difference elsewhere on the housing.
Do not declare a component defective solely because its feeding behavior changed. Quality personnel must assess it against the applicable requirements. A part within tolerance may expose a tooling limitation, while an out-of-spec feature may require incoming containment. The distinction affects the correct corrective action.
Review surfaces and contamination
Compare the actual condition of parts as received, including permitted finishes and residues. Note whether packaging or handling practice changed. The objective is to describe a difference, not to invent a cause from appearance alone.
Avoid adding lubricant, changing cleaning chemicals or manually trimming parts as a routine workaround. Such actions can alter the component and invalidate the comparison with the accepted process. Any trial involving a changed surface condition should be reviewed, authorized and documented by the responsible personnel.
Check whether the equipment condition changed
Review the setup record and inspect approved checkpoints for wear, retained debris, loose items or unintended contact. Confirm that the correct receiving nest and change parts remain installed. A lot change can coincide with cleaning or a shift handover, making timing alone misleading.
If a sensor indication differs, investigate the specified detection condition and the actual component appearance. Do not assume the sensor is faulty or change its sensitivity without a controlled test. A basic presence check may respond differently to a changed surface or position, depending on the installed sensing method.
Use a controlled comparison
Plan the comparison with engineering and quality. Define the sample groups, accepted machine setup and observations to record. Avoid switching between lots without a clearance procedure, especially where the components are visually similar.
Change only the approved variable under investigation. If the setup and incoming lot both change between trials, it becomes difficult to interpret the result. Record the sequence and limitations honestly; a small comparison can identify a useful direction without proving long-term production capability.
Separate containment from permanent correction
Containment protects the current process while the cause is investigated. It might involve holding an uncertain lot or using an approved alternate workflow. It should not be confused with a validated permanent solution, and it must follow the site's quality and safety procedures.
A permanent correction may concern component supply, tooling, handling instructions or the receiving sequence. Its scope should match the identified cause. Repeatedly increasing output settings without understanding the failure can turn a clear problem into several overlapping ones.
Verify against the original acceptance requirements
After an authorized correction, repeat the relevant acceptance checks: correct variant, required orientation, single-part presentation where specified and acceptable component condition. Include the operating sequence that exposed the problem, such as refill or restart.
If the correction changes tooling or the approved component range, update the controlled records. Make the accepted setup visible to the next shift. Retain the comparison evidence so that a similar event can be recognized without starting the investigation from zero.
Build a useful escalation report
A concise report should contain:
- Previous and current component lot identification.
- The unchanged or changed drawing revision and assembly state.
- The first visible point of different behavior.
- Tooling, recipe and receiving-fixture identification.
- Relevant component inspection findings.
- Authorized trials, results and remaining uncertainty.
- Containment status and the decision needed from engineering.
Attach only relevant photographs and permitted video. Clear evidence of the first deviation is more useful than a long recording of the whole production cell. Protect unrelated customer or production information when sharing material externally.
Common questions
Does a problem after refill prove the new lot is defective?
No. It establishes timing, not cause. Compare component requirements and machine condition before reaching that conclusion.
Can the old setup be replaced with a faster one?
Only through an authorized evaluation. A faster visible flow does not necessarily preserve orientation, component condition or the receiving sequence.
What should be sent to NexoFeed?
Send the comparison report and representative sample details with reference YH-750. Explain which conditions were verified and which remain uncertain so the engineering review can address the actual difference.