GUÍA TÉCNICA
A feeder changeover is complete only when the correct component reaches the assembly station in the approved condition. Emptying a bowl and selecting another recipe are important steps, but they do not prove that return paths are clear, the right tooling is installed or the first component is acceptable. In shaver assembly, closely related variants can make these omissions difficult to notice.
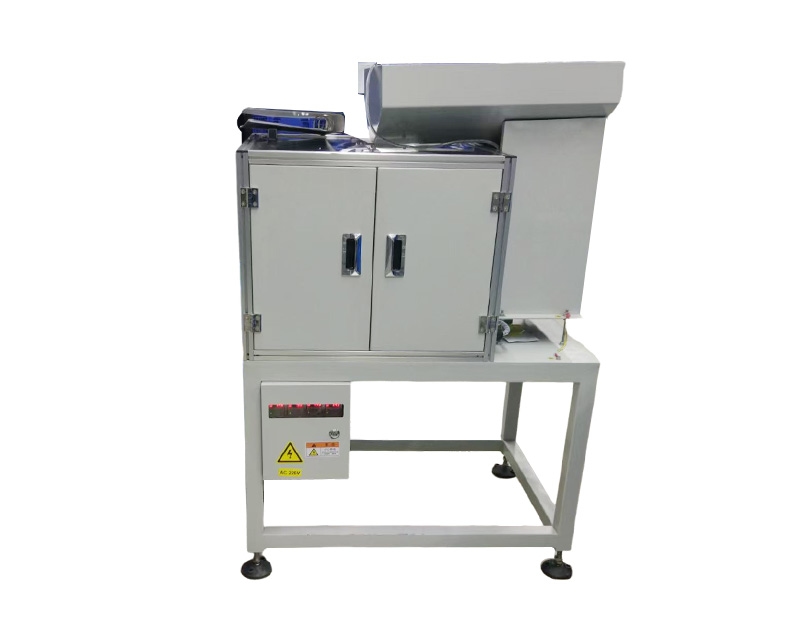
Use this checklist when developing the operating procedure for a YH-765 shaver component feeding application. It is a framework for the production and engineering teams, not a replacement for the delivered machine instructions. Only trained, authorized personnel should perform setup changes, using the site's isolation and guarding procedures.
View the application workflow diagram (conceptual illustration)
Prepare the next job before stopping the current one
Confirm the next component's part number, revision and approved production lot. Have its setup record, tooling identification and acceptance sample ready. If the incoming packaging or component differs from the record, resolve that difference before loading. A changeover should not become an improvised engineering trial because information is missing.
Identify which mechanical elements and control settings are expected to change. Some applications use dedicated tooling; others may permit approved shared components. Record that distinction clearly. A recipe name is not sufficient proof that the correct guides, transfer parts and receiving nest are physically present.
Finish and identify the outgoing material
Follow the approved sequence for stopping the cell and securing the equipment. Account for the remaining components from the outgoing job and place them in correctly identified containers. Do not combine unknown pieces with a fresh production lot merely because their appearance is similar.
Document the point at which the outgoing job ended. Where the assembly process requires lot traceability, the feeder clearance record should align with the receiving station's record. This helps prevent uncertainty about which lot supplied the last completed assemblies or the first assemblies after restart.
Clear more than the visible bowl
A component may remain in a return route, a transfer track, a release mechanism or the receiving nest after the bowl appears empty. Inspect the locations identified in the machine's clearance procedure under safe isolation. Use the approved tools and methods; do not introduce improvised objects that could damage a guide or leave debris.
If a part cannot be accounted for, stop the clearance process and investigate. The appropriate response is not to assume it will emerge harmlessly during the next run. Small, visually similar components can produce a mixed-variant condition that remains hidden until a later assembly operation.
Clean according to the component requirement
Use the cleaning method approved for both the equipment contact surfaces and the component being handled. Remove residue or loose material from the specified inspection points. Do not apply lubricants or cleaning chemicals simply because they seem to improve sliding; they may affect the part or the next assembly process.
Inspect contact surfaces while access is available. Note wear, damaged coatings or loose debris and escalate conditions outside the approved limits. Cleaning should reveal problems rather than conceal them. Confirm that surfaces are ready for use before loading the new component, including any drying or inspection requirement in the procedure.
Verify the tooling and receiving position
Compare installed tooling identification with the setup record. Check that the required guards and covers are restored and that access arrangements remain correct. Tooling adjustments should follow documented references; avoid using an old photograph as a substitute for a controlled setup dimension or engineering instruction.
Include the receiving station in this check. A feeder can present the correct component while the wrong nest or gripper remains installed downstream. Confirm the complete combination: component, feeder tooling, recipe, release arrangement and assembly fixture. Record who performed the verification when the quality plan requires it.
Load an approved trial quantity
Use the loading quantity and sequence defined for the application. Observe from outside the guarding as parts approach the outlet. Watch for unexpected nesting, unusual accumulation or a resting attitude that differs from the accepted setup. If the behavior is unfamiliar, stop and review rather than compensating immediately with a higher setting.
Compare the first pieces reaching the receiving station with the approved presentation sample. Check the functional and appearance-sensitive surfaces identified by the quality team. The inspection should evaluate the component after the complete feed path, not only a piece taken directly from the storage container.
Confirm the machine sequence
Verify the agreed stop-start interaction between feeder and assembly station. A ready signal, an occupied receiving position and a completed pickup are different states. Review them using the authorized test procedure so that the feeder does not continue supplying material into a blocked position.
Do not defeat an interlock or mask an alarm to finish the changeover. If a sensor appears inconsistent, investigate its intended detection condition with the controls team. The system must distinguish the relevant states reliably, including a missing part where the test procedure calls for that check.
Release production with a traceable record
The release record should be short enough to use consistently but detailed enough to explain what changed. Include the new part revision, lot, tooling references and recipe, together with first-off inspection results. If an engineering adjustment was required, link it to its authorization rather than leaving it as an undocumented setting.
A practical release checklist asks:
- Is the previous component cleared from all specified locations?
- Does the loaded lot match the job and component revision?
- Are feeder and receiving-station tools the approved combination?
- Are the first-off orientation and surface checks acceptable?
- Does the stop-start sequence operate as intended?
- Have guards, records and production authorization been completed?
Watch the first normal replenishment
An initial small load may not expose the same behavior as routine replenishment. After release, observe the first normal refill and the receiving station's response. Follow the agreed production monitoring procedure and record deviations before they become routine workarounds.
If operators repeatedly need to separate parts or change settings after replenishment, raise that pattern for engineering review. The issue may involve loading practice, component condition or tooling behavior. A successful changeover record should not normalize interventions that were never part of the accepted process.
Common questions
Can similar-looking variants share one setup?
Only if that combination has been evaluated and approved. Similar color or outline does not establish identical locating features or acceptable presentation.
Should settings be copied from the previous shift?
Use the controlled setup record. An undocumented shift-specific adjustment may conceal a fault and makes the next changeover harder to validate.
What should be sent when a changeover fails?
Provide the old and new part references, tooling and recipe information, the first visible failure and the inspection result. Contact NexoFeed engineering with reference YH-765 and describe the actual component variant rather than only the shaver model.